"Give a girl the right shoes, and she can conquer the world."
-Marilyn Monroe

Monday, September 22, 2014

A Little Goes A Long way.

Okay, lets get down to business. Time to talk about the bitch we all love to hate, eyeliner. Today we're going to cover all the types of liner, and styles of line that work for your eye shape. If you're unsure about what your eye shape is, click  here to go to a post of mine dedicated to figuring that out. If you don't know what kinds of liner are all out there, or you have questions about some of them, click here to read all about it! 
Lets get down and dirty.

Hooded eyes can be frustrating to have, especially when it comes to eyeliner. For this particular shape, I'd say stick to pencil liner, and keep it really close to your lashline. These eyes have very little lid space, and I cannot stress enough how much of a huge no-no having thick eyeliner that takes up all of your visible lid is. Most of the time, these eyes can just do with a bit of black tight-lining on the upper lid. Tightlining is a technique we use for making the eyelashes appear even more full and fluffy, you simply take your pencil, and line the bit of skin right underneath your eyelashes.
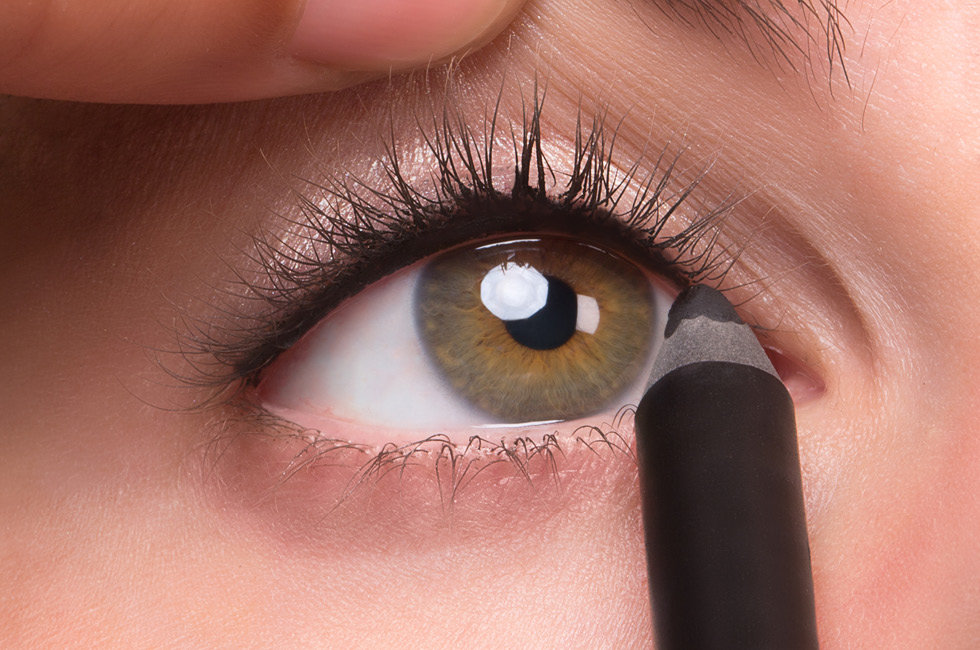
For an even more dramatic look, line that bottom water line with your black pencil too! I know it's a little disappointing, not doing big dramatic eyeliner with wings and whatnot, but when you work with your face instead of against it, you really will see a tremendous difference in your appearance.


Almond eyes follow a similar rule to hooded eyes, depending on the ammount of lid space you have. A lot of what eye liner styles your shape works with has a lot to do with lid space if you haven't noticed. Just use your better judgement on this, if you don't have a lot of room, all you need is a little bit. As far as limiting this shape to a type of liner, I'd say you have free reign on this one, pencils, gels, liquids, it's all good for you.
Round eyes are a great universal shape for eyeliner. Always remember, however, the eyeliner foul No. 1, Never let your liner become so thick that it disappears into your crease. But, since most round eyes have a lot of lid space, you can have fun with lots of cool winged looks and such. However, lid space is something you must use your better judgement on, I have round eyes, but I don't have all that much lid space, so I try to keep it close to my lashes. The same rule applies for downturned eyes and upturned eyes as well. Again, use your better judgement. I wouldn't limit you guys to any type of liner, experiment with all kinds and see which one you prefer the best.

Monolid eyes can do a variety of different things. Most people tend to like keeping their liner close to their lashes with a pencil, but it's not a must. With monolid eyes, you can blend your eyeliner into your crease if you want. With these eyes in particular, the 'no crease vacationing' rule doesn't apply much, because there's almost no lid space to begin with. This technique is quite simple, but I would go look for a video tutorial if you'd like a more accurate representation of this style of liner.

One last great all-spectrum tip is to line your bottom waterline with a nude color or white pencil, this will help your eyes appear more open and bright, this is good for all eye shapes and colors, and goes a long way in bringing any eye-look together.
A quick side note, after this post I will do some fun false eyelash tutorials, however after that I will be moving on to foundation and face makeup, for which I will be coupling my posts with videos, especially the tutorial posts. So if you're interested in that, go ahead and follow me so you'll be updated when that content is released!
I'll be starting with a review and working my way from my personal foundation routine to tutorials on contouring and color matching, along with a Sephora haul!
Ta-ta for now lovelies,

                    God Bless.


Sunday, September 14, 2014

A Fine Line Between Fab Queen and Drag Queen.

Let's talk about eyeliner.
This week I'll be touching on all the different kinds of eyeliner out there, the pro's and con's of each liner and which gives what effect. If you want me to do a review I probably will, because believe me sugar, there's a ton to cover.
  Eyeliner is such a broad topic, it's one of those things that all eye shapes can pull off, but some are more compatible with certain types of liner than others. So I want to babble a little bit about a great, all-spectrum liner. The classic pencil. There are a billion different kinds of pencil eyeliner, from gel-infused pencils to khol, variety is something you'll never run out of. As far as eye shapes I would limit to this kind of liner, I'd say hooded eyes mostly, eyes that have become hooded with age, or eyes that have very little open lid space. A huge eyeliner no-no is letting our dramatic black eyeliner take over all the space on our lid and disappearing into our crease. It's called eyeliner, not eyemasker.
Pencil liner is a great option for anyone with little to no lid space because it often times is very blendable product, so it doesn't give us a harsh line that'll just vacation in our crease. So instead of weighing down the upper lid even more with a bulky line, we can choose a grey or brown shade and blend it out to give us definition, and a lifted, smokier eye. However there are pencils that will give you a great defined black line, if that's what you so desire, you'll just have to shop specifically for them. The great thing about pencils is that they're super easy to apply, so if you want a more dramatic look just get the right pencil and it's splendidly carefree to put on, for this however I suggest the Sephora line of pencils. They're wonderful.
The con's of pencil is only that it falls quite easily. When pencil eyeliner falls, it collects underneath our lower lid, creating dark rings around our eyes. Pencil can wear off with as little as light humidity, but the more high end pencils do a great job of countering this unwanted effect. Purchasing a waterproof product will also combat this annoying side-affect to a great degree. Yet another way to prevent falling is setting your eye makeup with a setting spray or even hair spray. Combining all these techniques will almost guarantee your liner staying all day.

Liquid eyeliner is a favorite for a lot of people for its long lasting wear and great color, butI'm sure I don't have to tell you, this particular nugget takes quite a bit of patients to apply. I used to be a huge fan of this type of product, but now I find, not so much. But that's a matter of personal preference. Liquid eyeliner is great for anyone who's had a little practice with lining their eyes, practice and patients is definitely  required. The potion is just so malleable, it's easy to get messy, but it's a great liner for anyone who's looking for something to stay on all day, and a cheaper alternative to gel liner that can be much more frustrating to apply, but we'll cover that in a second. The pros of liquid liner is that it lasts all day, and looks genuinely great when applied correctly, the only downside is all of the frustration of applying it.

Gel eyeliner, or sometimes refereed to as cream liner,my personal favorite. This liner is a go-to for a lot of makeup artists. Its color is always dramatic and way pigmented no matter what shade you purchase it in. Even if you don't get a waterproof product, this eyeliner will practically glue itself to your lid (not so annoyingly as to be a chore to remove, but without using makeup remover, this thing is staying the eff put). This is the eyeliner that's going to give you that awesomely matte, Marilyn Monroe winged look. Perfect for any sort of performer, or someone who's looking for a heavy-duty sweat proof product to last through any sort of stressful environment. You will however need to purchase a gel-liner brush to apply it with, such as a short angled brush, or a bent-liner brush. If you're confused about what item to purchase specifically, the ladies at Sephora can definitely help you out. However, this product is incredibly unforgiving. Make a mistake and you might have to do your eye makeup completely over again just to undo it, so I wouldn't recommend gel to anyone who is new to liner, just for that reason.

Cake eyeliner comes in a powder form. To use this type of eyeliner, you first need to dampen your brush. Cake liner is way easy do apply, I found it to be easier than liquid liner. Although because the solution becomes watered down from your brush, its color will be somewhat diluted, becoming ever so slightly more grey than before. this problem can be easily fixed by setting the liner with some dark black eyeshadow. Once you do that, it's incredibly fantastic looking. The color is so rich and deep, you could compare it to gel! However this product does infact fall, you can use setting spray but it never helped much for me. It doesn't fall worse than pencils though, which is totally a plus. Cake is the one of the quickest (besides pencils) products you could use, it's great for anyone looking to get it done.

Personally, I enjoy gel liner. It's long wear and dramatic look is perfect for stage work, which I do a bit of. It'll stay on no matter what you're doing, whether it's sitting in front of a computer blogging, or dancing Russian ballet. But personal biases aside, all of these liners are great choices for every kind of person and activity level. If you have any questions about the different types of liners, feel free to ask, I'll be happy to help with whatever I can.
Next week I'll be talking about which eyeliner looks work with what eye shape, what eyeliner I would suggest for you and more!
See you then!

As awlays,

           God Bless.


Sunday, September 7, 2014

Our Eye Shape And Why It Matters.

Alright, now it's time to get serious. Lets go further into discovering what there is to know about eye makeup by talking about our eye shape. I found this great video regarding the subject by Smashbox (which is an amazing high end makeup company that I adore). You can find a link to the individual tutorials on each eye shape at the end of this post. So lets get started.


Now that we know our eye shape and what styles of shadow compliment us the best, I want to take a little time to talk about how important this is. When we start getting into makeup for the first time in our early teens, we use it to cover up our flaws. We try to hide behind it, work against the structures of our face that we think are unsightly. This is such a big mistake for a couple of reasons. First of all, hiding behind our makeup is bad for us psychologically, it makes us feel inadequate, as if our makeup is the only thing that makes us acceptable enough to go outside. Please stop, makeup is a tool for us to use to have fun, to make art with! Not hide behind. Sure makeup can help us have confidence, but we shouldn't need it to feel acceptable.

Secondly, sometimes we find that we don't like the shape of our eyes, or our face, say you have downturned eyes and you'd like them to be lifted more, so instead of doing eye makeup that compliments your shape, you apply shadows for an upturned eye instead. This isn't going to work for the obvious reasons, but I see so many people trying to transform the natural structure of their face because their unhappy with it. This just ends up looking a little weird; it's healthier to just accept our faces and bodies as they naturally are and work with them, instead of working against them. This'll come in handy more and more often when we start talking about face makeup and contouring.
Long story short, it's imperative that we accept ourselves the way we are, and flaunt our naturalborn features instead of trying to change them. You're perfect just the way you are, you don't need makeup to 'make up' for what you don't have, it's there for enjoyment.

Tutorial list:

For Round Eyes

For Downturned Eyes

For Hooded Eyes.

For Monolid Eyes

For Almond Eyes

For Upturned Eyes


Now go and have fun lovelies!

Until next week,

                  God Bless, 


Saturday, September 6, 2014

Fierce Sexy Claws.

This week, we'll take a break from the tedious mascara process and focus on something fun! Let's do some nail art.
 Today we're going to be learning a simple, sophisticated design perfect for any occasion!
Let's get started.

For this tutorial you will need:

At least 1 striper nail polish. They can be found at any Wal-Mart or drugstore, for this tutorial I use white and a sliver glitter polish but the accent glitter is completely optional if you don't want to get too complex. They can be distinguished from regular nail varnishes by their unusually thin packaging. These are used for precision lines, an absolute must have for this tutorial. The brush will look something like the photo given.


this photo is not mine or of my nail art, I will be later uploading
a photo of my own nails later
Full credit to whoever created this as I have no idea
who did it.


1 regular colored polish of your choice, my only piece of advice is that if you want the color of your design to be light (such as white or a pastel color), choose a dark polish to put underneath it. Reverse if you chose a dark striper color, chose a lighter base color. This will help your design to stand out as much a possible.

1 Top coat. This will add a beautiful shine to your design and help it stay in place without chipping. Base coat is optional, as it is hard to find one that will apply well without becoming so thick it just peels off of your nail the next day, it's only perpose is to protect your natural nail, but if you take breaks in between wearing varnishes, you'll be fine.

Let's begin by placing our first coat of our base color directly onto our nail. Make sure you wipe the excess lacquer off the brush and stem before applying it onto your nail. Don't worry about it not being completely opaque, another coat should be applied using the same discarding technique that we used for the first layer. This ensures that our varnish doesn't bubble, dries more quickly, and has less of a possibility to get damaged.
once both coats have completely  dried, take your striper, wipe the extra product off, and begin your design! Start at any corner of the nail you like and start with the bottom flair. You can create the flair by simply guiding the brush in a swooping upward motion, until the line becomes very fine, seemingly disappearing from view. Continue making the flairs until you have three, all swooping out a little above one another (make sure you have enough space between them to create another flair, this step is very important), make sure that they all connect in the corner so they appear organized.
Now you have the option to create two more flairs with your glitter striper. In between the first and second flair, place a glitter flair. Now create one in between the second and third and you're done! This simple design can be created with any colors, and suits any and every event. Have fun cuties!

Until next week,

                  God Bless.